How to BBQ Brisket on a Gas Grill
Cooking brisket on a gas grill might seem intimidating, especially compared to traditional smoking or charcoal grilling. But with the right techniques and a bit of patience, you can achieve that mouth-watering, tender, and flavorful brisket right on your gas grill. This guide will teach you how to BBQ a brisket on a gas grill, along with tips and tricks to get that perfectly grilled meat.
The main challenge is maintaining a consistent low temperature and achieving that coveted smoky flavor. Gas grills aren’t typically designed for low and slow cooking, but with a few tweaks and some insider knowledge, you can turn your gas grill into a brisket-cooking powerhouse.
So, let’s dive into the process and turn your gas grill into your secret weapon for perfectly cooked brisket.

Selecting the Perfect Brisket
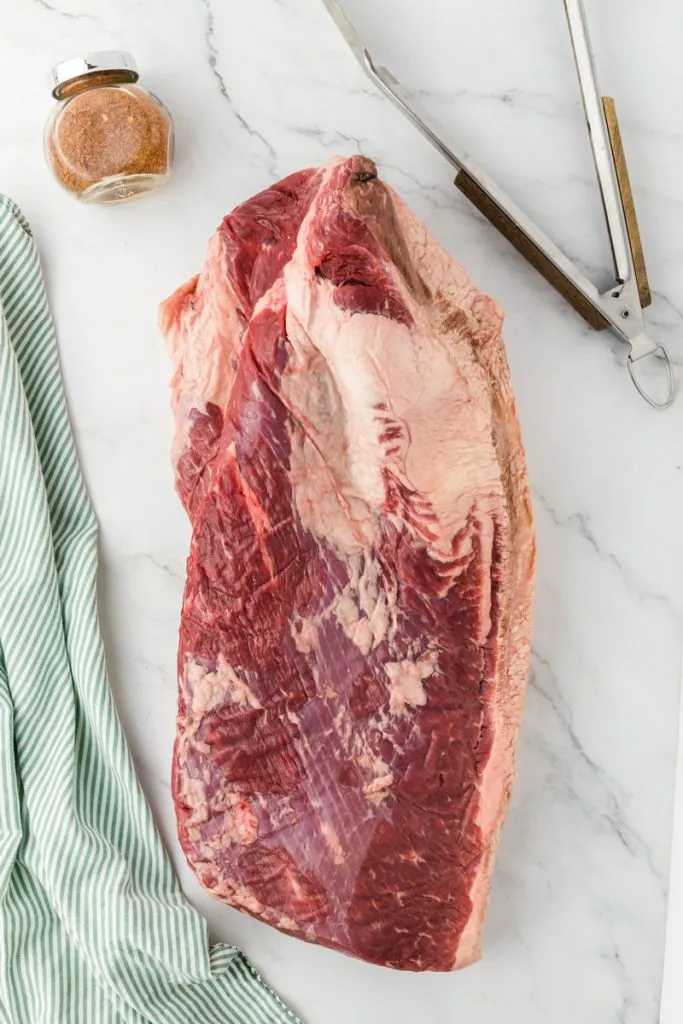
Choosing the right brisket is key to a successful BBQ. Here are a couple of important factors to consider: marbling and size.
- Marbling: Aim for a brisket with good marbling, which means having thin streaks of fat running through the meat. This fat melts during cooking, keeping the meat juicy and packed with flavor. A well-marbled brisket generally results in a more tender and delicious meal.
- Size: Pick a brisket size that fits your grill and suits the number of people you’re serving. A whole packer brisket, which includes both the point and flat cuts, is great for larger gatherings and offers a variety of textures and flavors.
If you’re cooking for a smaller crowd or have limited grill space, go for the flat cut. It’s leaner and more uniform in shape, making it easier to cook evenly on a gas grill.
Necessary Ingredients and Tools
Before diving into cooking, gather all the necessary ingredients and tools to ensure everything goes smoothly. Here’s what you’ll need:
Ingredients:
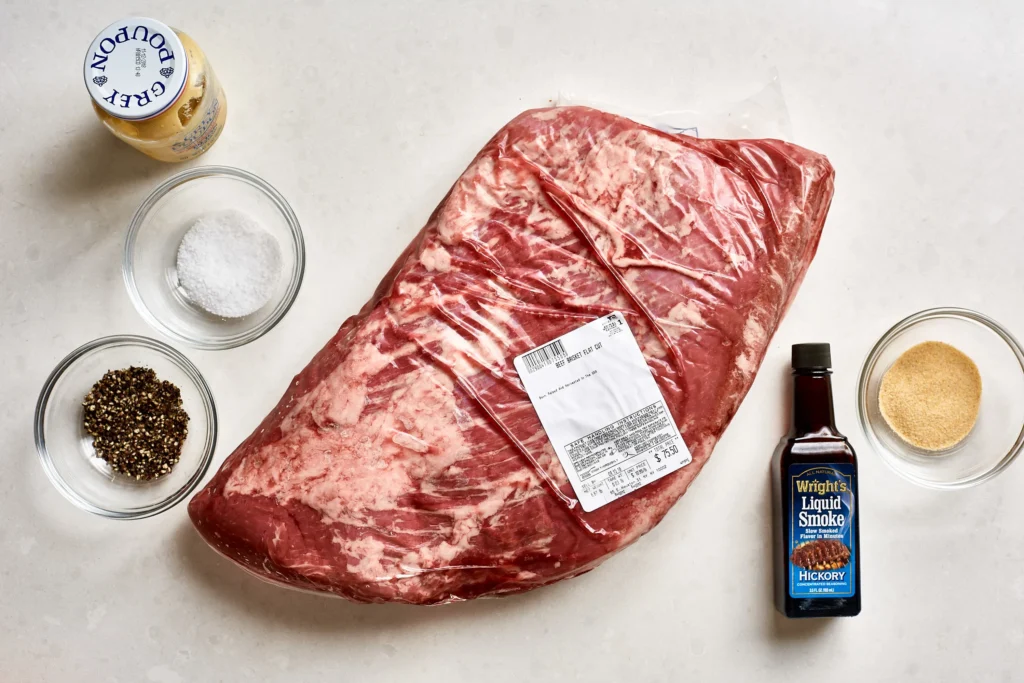
For a flavorful and tender brisket, use a well-balanced blend of seasonings. Here are the specific ingredients for marinating or seasoning your brisket:
- Kosher Salt: 2 tablespoons
- Black Pepper: 2 tablespoons
- Paprika: 1 tablespoon
- Garlic Powder: 1 tablespoon
- Onion Powder: 1 tablespoon
- Brown Sugar (optional for a touch of sweetness): 1 tablespoon
- Olive Oil: Enough to lightly coat the brisket
- Apple Juice: 1 cup (for spritzing)
- Apple Cider Vinegar: 1 cup (for spritzing)
- Wood Chips: Hickory or mesquite, soaked in water for at least 30 minutes
Tools:
Make sure you have these tools on hand to make the cooking process easier:
- Gas Grill
- Meat Thermometer
- Aluminum Foil
- Spritz Bottle
- Tongs
- Basting Brush
- Grill Brush for Cleaning

Preparing the Brisket
Proper preparation is crucial for a tender, flavorful brisket. Here’s how to get your brisket ready for the grill:
- Trim the Brisket: Start by trimming any excess fat from the brisket, leaving about a quarter-inch layer. This fat will render down during cooking, keeping the meat moist.
- Coat with Olive Oil: Lightly coat the entire brisket with olive oil. This helps the seasoning stick better and creates a nice crust on the outside of the meat.
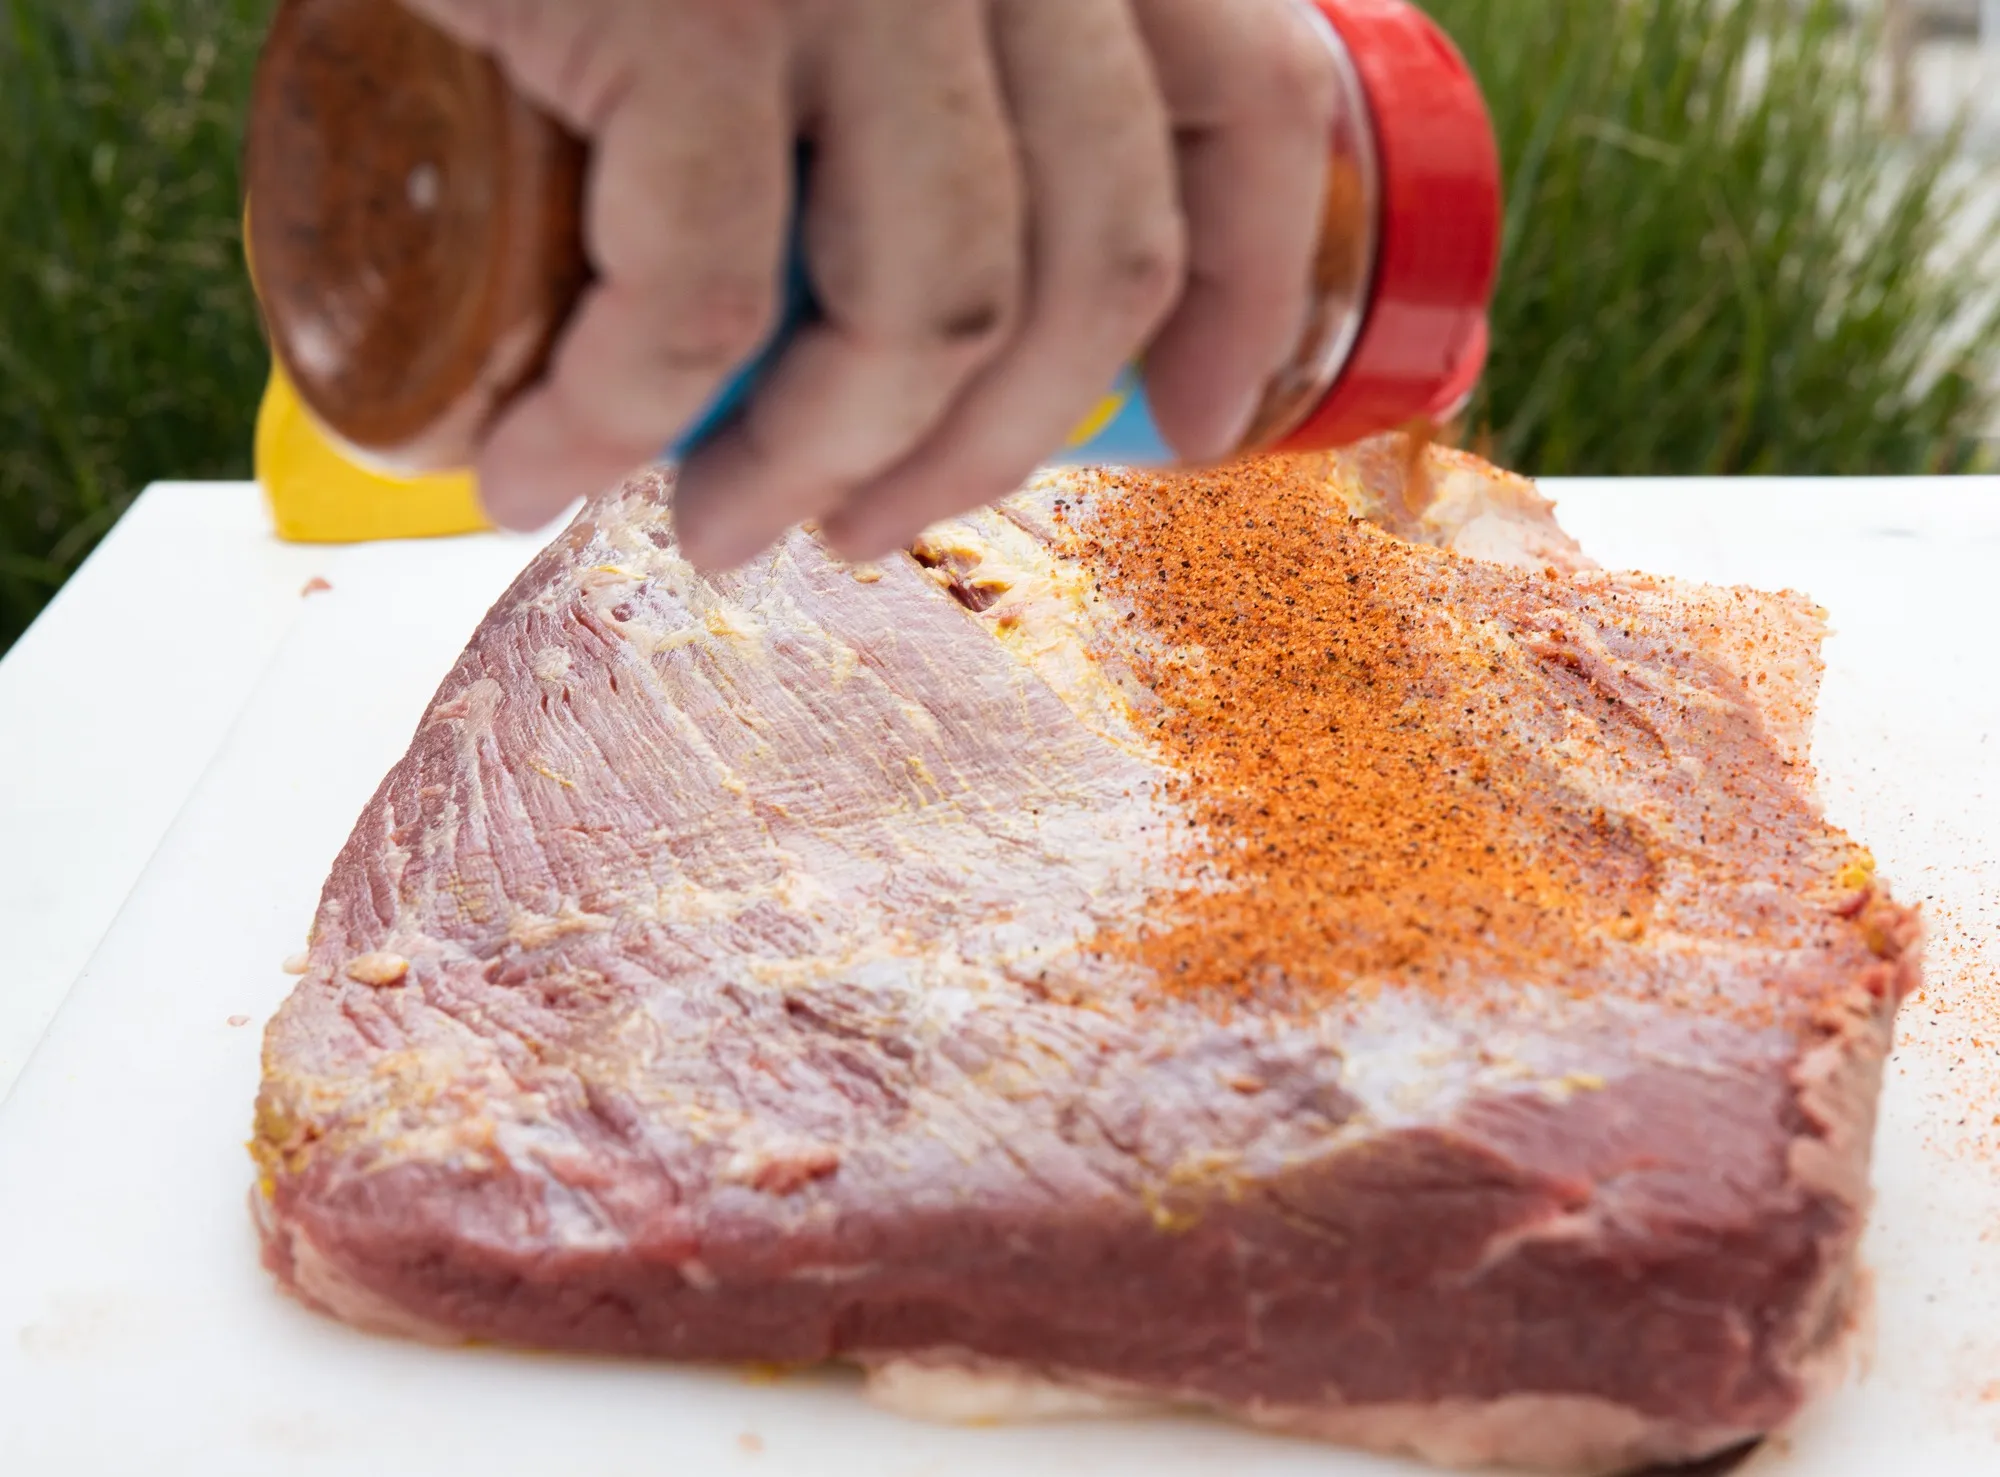
- Apply the Rub: In a small bowl, mix together the kosher salt, black pepper, paprika, garlic powder, onion powder, and brown sugar (if using). Generously apply the rub to all sides of the brisket, ensuring an even coating. This rub will infuse the meat with flavor and form a delicious bark as it cooks.
- Marinate: Once seasoned, place the brisket in a large resealable plastic bag or wrap it tightly in plastic wrap. Let it marinate in the refrigerator for at least 2 hours, or preferably overnight, allowing the flavors to deeply penetrate the meat.

For a simpler preparation, try our Crock Pot Brisket Recipe – With Just 5 Ingredients! It guarantees a tender and flavorful brisket with minimal effort.
Setting Up Your Grill
Properly preparing your gas grill is essential for mastering the low and slow cooking method needed for brisket. Follow these steps to set up your grill perfectly:
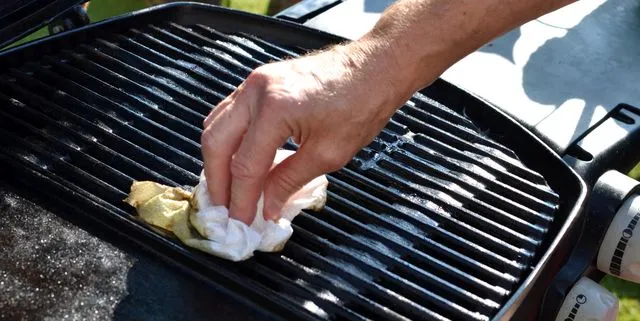
- Clean the Grill: ,Start by thoroughly scrubbing your grill grates to remove any old food residue. This will prevent unwanted flavors and ensure even cooking.
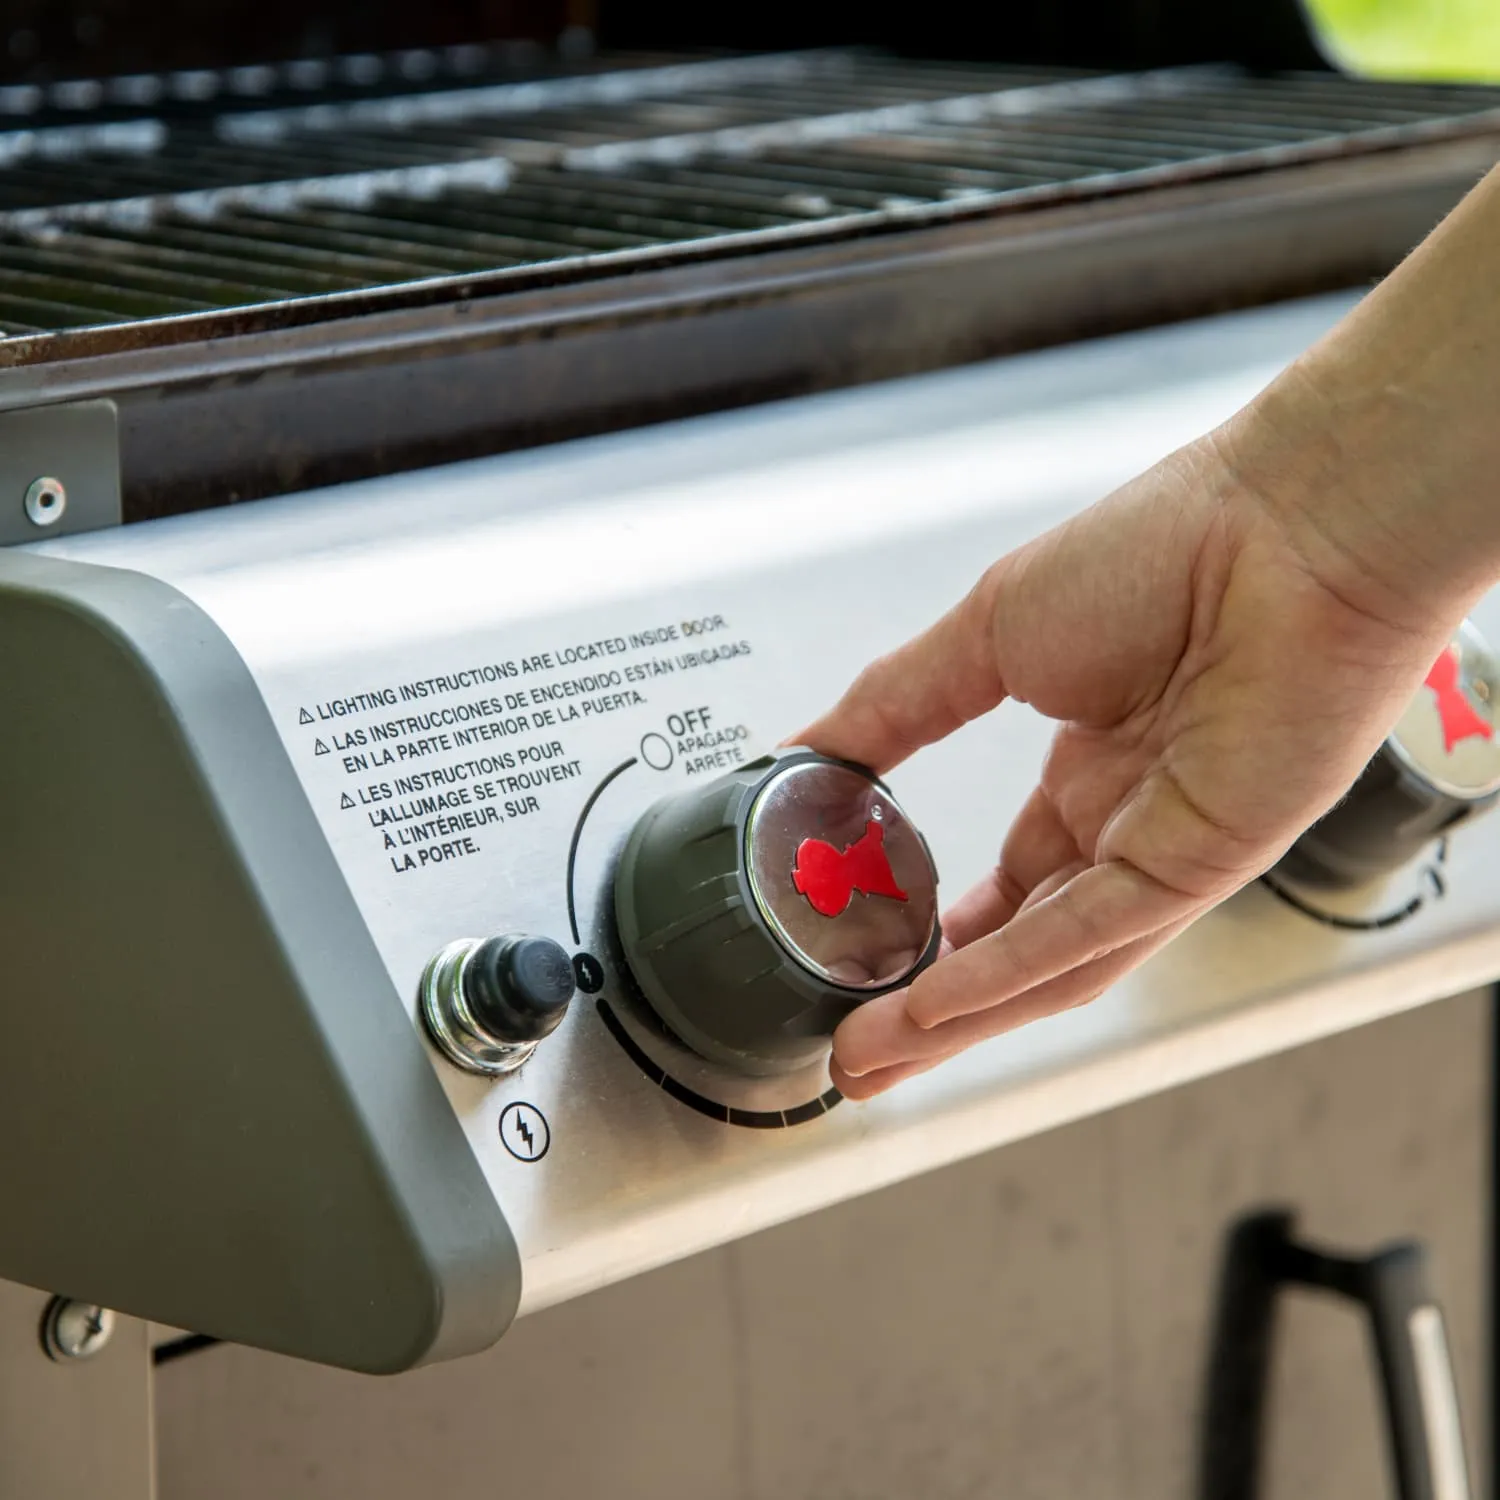
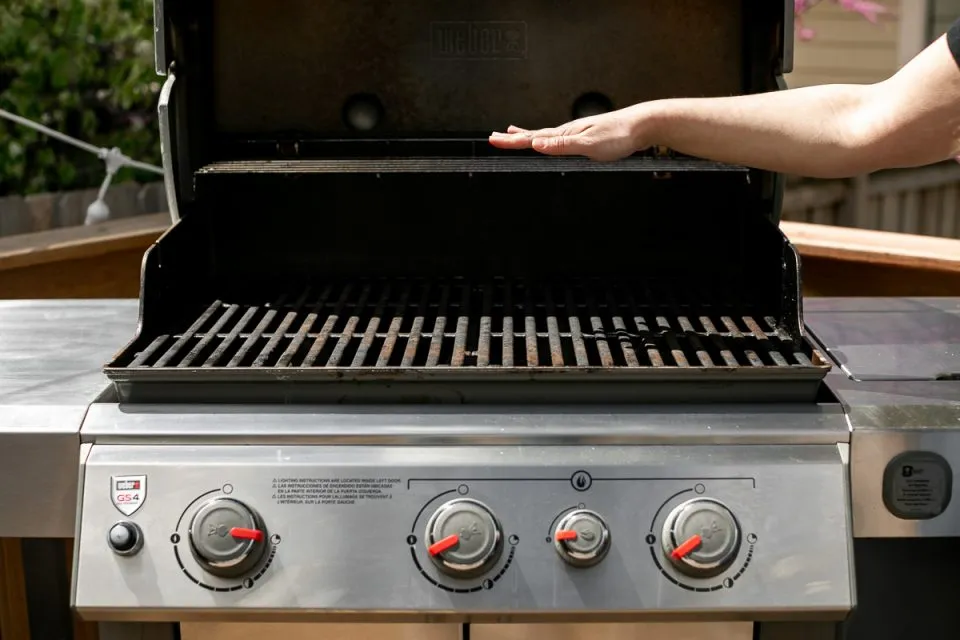
- Preheat the Grill: Turn on your gas grill and preheat it to a temperature of 225-250°F (110-120°C). This low temperature is crucial for slowly cooking brisket, allowing the meat to become tender without drying out.
- Set Up Indirect Heat: For indirect grilling, only turn on one side of your grill’s burners. If you have a three-burner grill, turn on the left and right burners and leave the center burner off. For a two-burner grill, turn on one burner and leave the other off. This creates a cooler zone where the brisket will cook indirectly.
- Add a Drip Pan: Place a drip pan filled with water directly under the spot where the brisket will sit. This helps regulate the temperature and adds moisture to the grill environment, preventing the brisket from drying out.
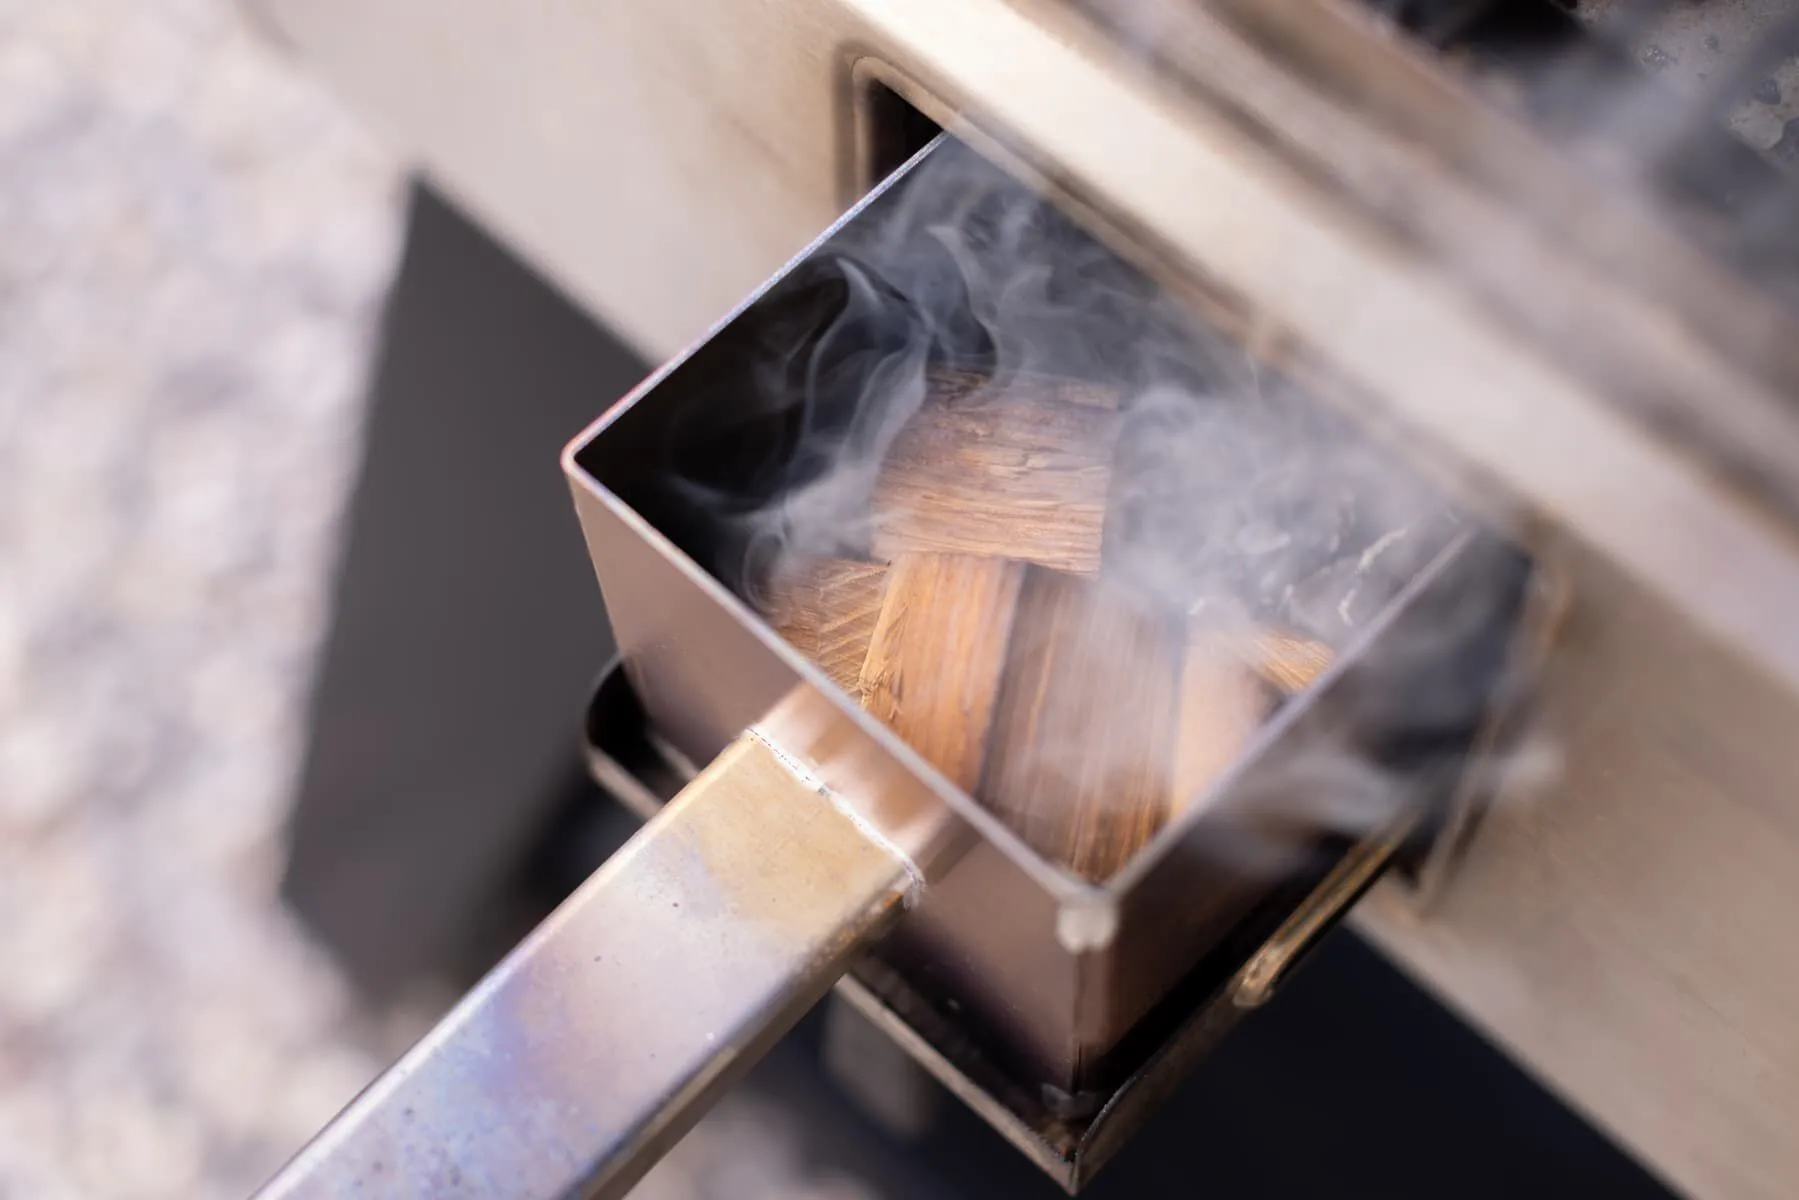
- Prepare the Wood Chips: Drain the soaked wood chips and place them in a smoker box or wrap them in aluminum foil, poking holes to allow smoke to escape. Position the wood chip box or foil pouch over the lit burner. This will generate smoke, adding that classic barbecue flavor to your brisket.
- Adjust the Temperature: Close the grill lid and allow it to stabilize at 225-250°F. Use a grill thermometer to monitor the internal temperature. Adjust the burners as necessary to maintain a consistent low temperature.
- Place the Brisket on the Grill: Once the grill is at the desired temperature and smoke is being produced, place the brisket on the cooler side of the grill, over the drip pan. Close the lid and let the slow cooking process begin.
Grilling the Brisket
With your grill set up and your brisket ready, it’s time to start cooking. Here’s a step-by-step guide to ensure your brisket turns out perfect:

- Position the Brisket: Place the seasoned brisket on the cooler side of the grill, over the drip pan, with the fat side facing up. This allows the fat to render down through the meat, keeping it moist and flavorful.
- Monitor the Temperature: Close the grill lid and use the grill thermometer to maintain a steady temperature between 225-250°F (110-120°C). Adjust the burners as needed to stay within this range.
- Generate Smoke: Ensure the wood chips are producing smoke. If the smoke diminishes, add more soaked wood chips to the smoker box or foil pouch. Consistent smoke is key to infusing the brisket with that desired barbecue flavor.
- Lid Positioning: Keep the grill lid closed as much as possible to maintain the temperature and smoke inside. Only open the lid briefly to check the brisket or add more wood chips if necessary. Frequent lid opening can cause temperature fluctuations and extend the cooking time.
- Spritzing the Brisket: Every hour, spritz the brisket with the apple juice and apple cider vinegar mixture using a spray bottle. This helps keep the meat moist and adds an extra layer of flavor. Be quick to minimize heat loss.
- Cooking Time: Cooking a brisket is a slow process and can take anywhere from 1 to 1.5 hours per pound, depending on the size of the brisket and the consistency of your grill temperature. Plan for at least 6-8 hours of cooking time for an average-sized brisket.
- Check Internal Temperature: Use a meat thermometer to check the internal temperature of the brisket. Aim for an internal temperature of around 195-205°F (90-96°C) for the brisket to be fully cooked and tender.
- Wrap the Brisket (Optional): About halfway through the cooking process, when the brisket reaches an internal temperature of around 160°F (71°C), you can wrap it in aluminum foil or butcher paper. This helps retain moisture and speed up the cooking process. Place it back on the grill after wrapping.
- Resting the Brisket: Once the brisket reaches the desired internal temperature, remove it from the grill and let it rest, wrapped in foil, for at least 30-60 minutes. This allows the juices to redistribute, making the brisket more tender and flavorful.
For a more hands-off approach, our Easy Slow Cooked Oven Brisket Recipes offer an alternative way to achieve that perfect brisket without the need for constant monitoring.
Maintaining Proper Temperature
One of the biggest challenges when grilling brisket on a gas grill is maintaining a consistent low temperature. Here’s how to effectively monitor and adjust the grill temperature during the cooking process:

- Use a Grill Thermometer: Always have a reliable grill thermometer to monitor the internal temperature of your grill. Built-in thermometers on gas grills are often inaccurate, so an external thermometer is essential.
- Adjusting Burners: Start by setting your burners to low. If your grill has multiple burners, use only one or two to create an indirect heat zone. Adjust the flame as needed to maintain the target temperature of 225-250°F (110-120°C).
- Vent Management: Use the grill vents to help control the temperature. Opening the vents increases airflow and raises the temperature, while closing them decreases airflow and lowers the temperature. Find a balance that keeps your grill within the desired range.
- Monitor Regularly: Check the grill temperature every 30 minutes to ensure it stays consistent. Make minor adjustments to the burners and vents as necessary to keep the heat steady.
- Avoid Opening the Lid Frequently: Each time you open the grill lid, heat escapes, causing temperature fluctuations. Keep the lid closed as much as possible and only open it briefly to check the brisket or add wood chips.
Adding Smoke Flavor
Getting that classic barbecue flavor on a gas grill involves adding a smoky taste to your brisket. Here’s how to achieve that perfect smoky brisket:

- Wood Chips Preparation: Soak wood chips (like hickory or mesquite) in water for at least 30 minutes before grilling. Soaking helps the chips smolder slowly instead of burning quickly, ensuring a steady release of smoke.
- Using a Smoker Box: Place the soaked wood chips in a smoker box and position it directly over the lit burner. As the wood chips heat up, they will begin to smolder and produce smoke.
- Foil Pouch Method: If you don’t have a smoker box, use aluminum foil. Put a handful of soaked wood chips in the center of a large piece of foil, fold it into a pouch, and poke several holes in the top to let the smoke escape. Place the foil pouch over the lit burner.
- Maintain Smoke Production: Keep an eye on the smoke output. If the smoke reduces, add more soaked wood chips to the smoker box or replace the foil pouch with a new one. Consistent smoke is crucial for infusing the brisket with flavor.
- Placement of the Brisket: Place the brisket on the cooler side of the grill, away from direct heat. This allows the smoke to circulate around the meat, giving it a rich, smoky flavor.
Monitoring the Meat
Ensuring your brisket is perfectly cooked requires closely monitoring its progress. Here’s how to determine doneness using meat thermometers and visual cues:

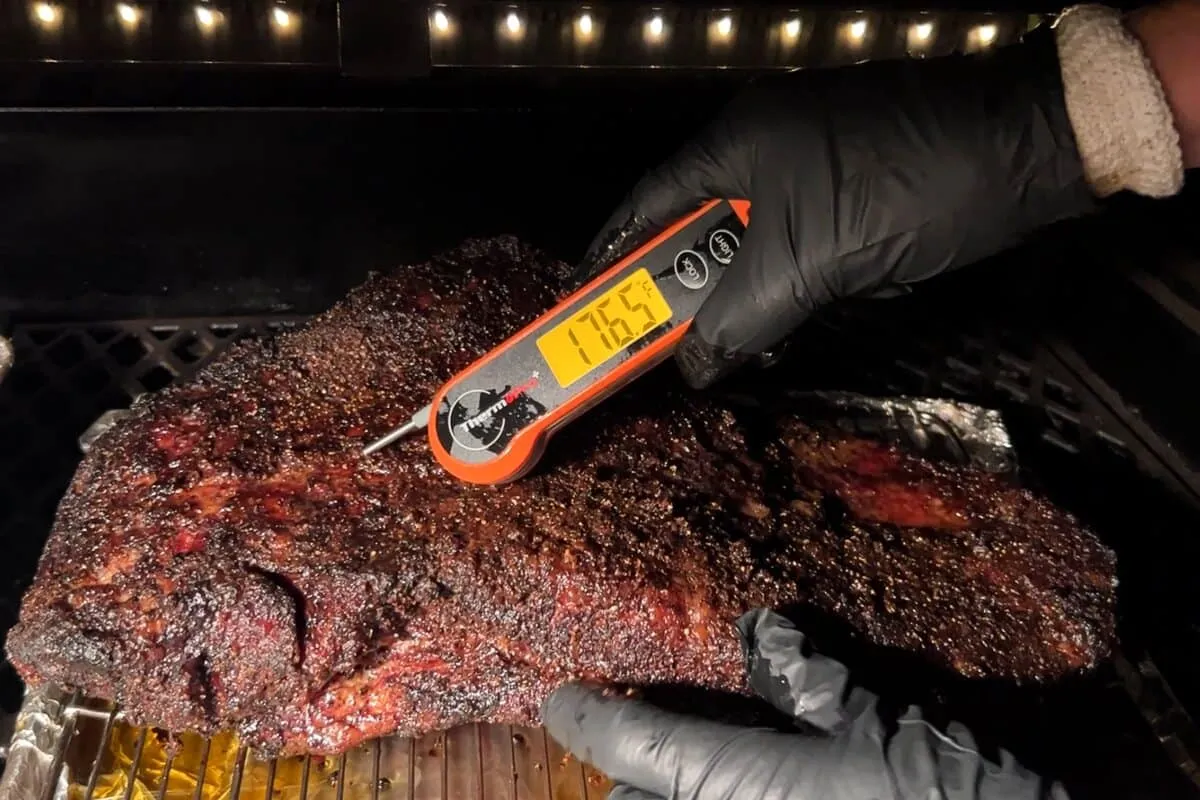
- Use a Meat Thermometer: A reliable meat thermometer is essential when cooking brisket. Insert the thermometer into the thickest part of the brisket, avoiding fat pockets. The brisket is typically done when it reaches an internal temperature of 195-205°F (90-96°C).
- Check for Tenderness: Beyond temperature, tenderness is a key indicator of doneness. When the brisket reaches about 195°F, start checking for tenderness by inserting a probe or fork into the meat. It should go in with little resistance, similar to room-temperature butter. If it’s still tough, give it more time.
- Bark Formation: Visual cues are also important. The exterior of the brisket should have a dark, crusty bark formed by the caramelization of the rub and the smoke. This bark indicates that your brisket is cooking correctly.
- The Jiggle Test: Another visual cue is the jiggle test. When you pick up the brisket with tongs, it should feel soft and have a slight jiggle, indicating that the connective tissues have broken down and the meat is tender.
- Resting the Brisket: Once the brisket reaches the desired internal temperature and tenderness, remove it from the grill and let it rest. Wrap it in foil or butcher paper and let it sit for at least 30-60 minutes. This resting period allows the juices to redistribute, ensuring a moist and flavorful brisket.
When is Brisket Done?
To know when your brisket is perfectly cooked, you need to pay attention to both the internal temperature and the texture. Here’s how to figure out if your brisket is ready:
Internal Temperature: Aim for an internal temperature of 195-205°F (90-96°C) to ensure your brisket is tender and juicy. At this temperature, the connective tissues and collagen break down, giving you a delicious, tender brisket. Use a meat thermometer to check the temperature, inserting it into the thickest part of the brisket, avoiding fat pockets.
Texture Indicators:
- Tenderness: Once the brisket hits around 195°F, check for tenderness. Insert a probe, fork, or toothpick into the meat. It should slide in easily, much like going into softened butter. If it’s still tough, give it more time to cook and check again.
- Bark: Look for a dark, crusty exterior. This bark forms from the caramelized rub and smoke, adding a flavorful and textural contrast to the tender meat inside.
- Jiggle Test: Pick up the brisket with tongs or gently shake it. If the meat has a slight jiggle, it indicates that the connective tissues have broken down and the brisket is tender.
Resting the Brisket: After reaching the desired internal temperature and passing the tenderness and jiggle tests, let your brisket rest. Wrap it in aluminum foil or butcher paper and let it sit for at least 30-60 minutes. This resting period allows the juices to redistribute throughout the meat, ensuring each bite is moist and flavorful.
Post-Grill Resting and Serving
After hours of careful grilling, the final steps of resting and serving are crucial for a delicious result. Here’s why and how to do it right:
Importance of Resting: Resting the brisket after grilling is essential. During cooking, the juices move towards the surface due to the heat. Allowing the brisket to rest for 30-60 minutes after grilling lets these juices redistribute throughout the meat, making each slice moist and flavorful. Cutting into it too soon can result in a dry brisket, as the juices will spill out.
How to Rest the Brisket: Take the brisket off the grill and wrap it tightly in aluminum foil or butcher paper. You can also place it in a cooler (without ice) to keep it warm while it rests. This helps retain heat and allows the brisket to continue cooking gently, breaking down any remaining connective tissues.
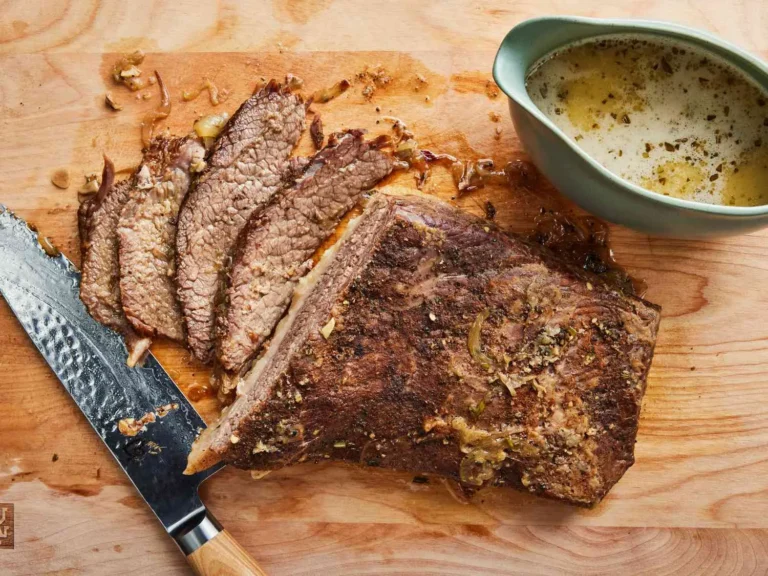
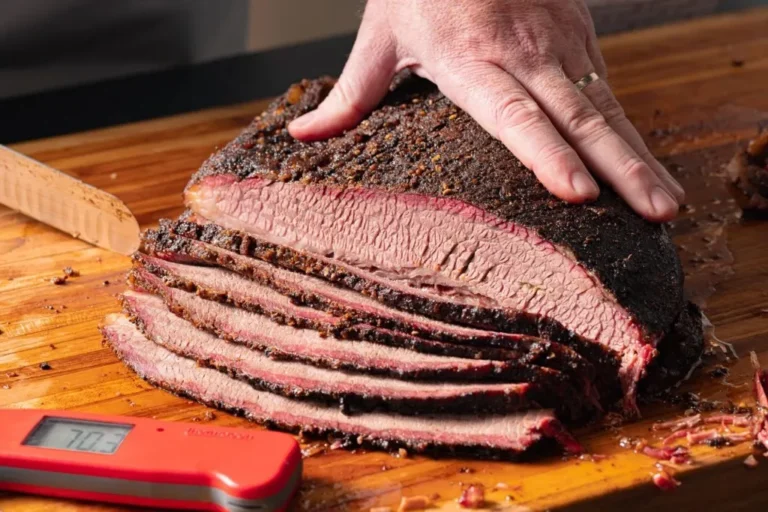
Slicing the Brisket:
- Use a Sharp Knife: Slice the brisket with a sharp knife.
- Separate Cuts: If you haven’t already, separate the flat and point cuts.
- Slice Against the Grain: Cut against the grain of the meat to ensure tenderness. For the flat cut, this typically means slicing perpendicular to the length of the brisket. The point cut has a different grain direction, so rotate it to continue cutting against the grain.
Serving Tips:
- Presentation: Arrange the brisket slices on a platter to show off the beautiful bark and juicy interior.
- Sauce: Serve the brisket plain or with your favorite barbecue sauce on the side.
- Garnish: Add a few sprigs of fresh herbs or a sprinkle of coarse sea salt for an extra touch of flavor and presentation.

Following these steps ensures your brisket is tender, flavorful, and a crowd-pleaser. Enjoy!
Troubleshooting Common Issues
Cooking brisket on a gas grill can be tricky, but with the right techniques, you can easily tackle common problems. Here’s how to solve some typical issues:
Uneven Cooking:
Solution: Uneven cooking often happens due to hot spots on the grill. To fix this, use the two-zone cooking method by placing the brisket on the cooler side of the grill. Rotate the brisket periodically to ensure it cooks evenly. Using a drip pan filled with water can help regulate the temperature and create a more even cooking environment.
Temperature Fluctuations:
Solution: Maintaining a steady low temperature is essential for brisket. Use a reliable grill thermometer to keep an eye on the temperature. If you notice fluctuations, adjust the burner settings. Wind and weather can affect grill temperature, so use a grill cover or place your grill in a sheltered area to minimize these effects.
Dry Brisket:
Solution: A dry brisket is usually the result of cooking at too high a temperature or not allowing the meat to rest. Cook the brisket low and slow at 225-250°F. Use a spritzing mixture of apple juice and apple cider vinegar to keep the meat moist during cooking. Wrapping the brisket in aluminum foil or butcher paper halfway through can also help retain moisture.
Tough Brisket:
Solution: A tough brisket means it hasn’t cooked long enough for the connective tissues to break down. Ensure the internal temperature reaches 195-205°F, and use a probe or fork to check for tenderness. If it’s still tough, let it cook longer and be patient.
Additional Recipes and Suggestions
Cooking brisket on a gas grill opens up a world of delicious possibilities. Here are some complementary dishes and variations to enhance your brisket experience:
Additional Recipes:
- Brisket Croissants: Transform leftover brisket into gourmet croissants. Shred the brisket and mix it with barbecue sauce and cheese. Roll the mixture into croissant dough and bake as per the dough package instructions. These savory pastries are perfect as snacks or appetizers.
- Brisket Tacos: Create brisket tacos for a fun twist. Warm up corn or flour tortillas, fill them with sliced brisket, and top with fresh pico de gallo, avocado slices, and a drizzle of lime crema. These tacos are great for casual gatherings or weeknight dinners.
Unique Side Dishes:
- Smoked Mac and Cheese: Add a smoky flavor to your mac and cheese by cooking it on the grill alongside your brisket. Use a cast-iron skillet and stir in smoked cheese for an extra flavor boost.
- Grilled Corn Salad: Pair your brisket with a vibrant grilled corn salad. Grill corn on the cob until slightly charred, cut off the kernels, and mix with diced tomatoes, red onion, cilantro, and a squeeze of lime juice.
- Garlic Herb Roasted Potatoes: Grill potatoes with olive oil, garlic, rosemary, and thyme. These crispy, flavorful potatoes make a perfect side dish for your smoky brisket.
Connect With Us
We’d love to hear about your brisket grilling adventures and see your dishes! Share your experiences, tips, and photos in the comments below. Follow us on social media and tag us in your posts. Let’s build a community of barbecue enthusiasts and exchange ideas to make every grilling session a success.
Disclosure: Our blog contains affiliate links to products. We may receive a commission for purchases made through these links. However, this does not impact our reviews and comparisons. We try our best to keep things fair and balanced, in order to help you make the best choice for you.
Written by José Luis Villalobos — The Pitmaster Behind the Fire. Born in Valparaíso, Chile, raised on the asado traditions of the Chilean campo, and now based in Sacramento, California. Over 20 years of live-fire cooking across two continents — from Chilean parrillas to Texas-style offset smokers. This site is where those two worlds meet. Read more →